 Ideas
for Composition in
Ideas
for Composition in
Nature Photography
Text and photos by Jon
Hill, May 2004
Return
to Articles Page
You've probably
heard that people use one side of their brain more than the other
and that one side is more artistic while the other is more analytical
or technical. Photography can be challenging for either type of person,
because it requires both types of thinking. I am more technically-minded,
but as a grow older I find myself appreciating the artistic more and
more, perhaps because it is a challenge for me personally to express
ideas artistically.
Fortunately,
great minds in the past have thought analytically about art and have
summarized some ideas that can help the techies move toward making
art that others will appreciate. This article will draw on those ideas,
add some of my own thoughts, and give examples of photos that illustrate
some of these so-called "rules of composition". If you practice
these, they will become second-nature and you will have acquired an
"eye" for good composition.
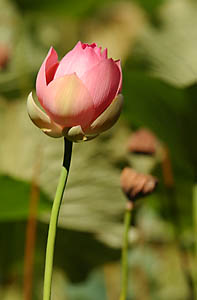
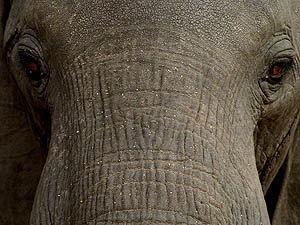 1)
Look for new points of view. Many eye-catching photos are made when
someone sees something in a way most people do not. Most people do
not look up at flowers. Most people do not look down
on clouds. Most people do not look at an elephant face from 3 feet
away. Wide-angle and telephoto lenses can help photographers alter
perspective and apparent points of view. That shot of the elephant
can be made much more safely from 30 feet using a good telephoto,
and still alter the point of view enough to be eye-catching. The other
way to alter point of view is to move the camera. Lie down on the
ground. Climb a mountain, or even just climb your car. Look at things
in new ways.
1)
Look for new points of view. Many eye-catching photos are made when
someone sees something in a way most people do not. Most people do
not look up at flowers. Most people do not look down
on clouds. Most people do not look at an elephant face from 3 feet
away. Wide-angle and telephoto lenses can help photographers alter
perspective and apparent points of view. That shot of the elephant
can be made much more safely from 30 feet using a good telephoto,
and still alter the point of view enough to be eye-catching. The other
way to alter point of view is to move the camera. Lie down on the
ground. Climb a mountain, or even just climb your car. Look at things
in new ways.
2) Simplify.
Often the most effective images have only a few elements. Put too
much in your photo and viewers aren't sure what you are try to convey
or even what your picture's main subject is.
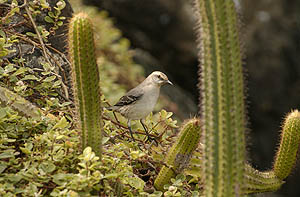
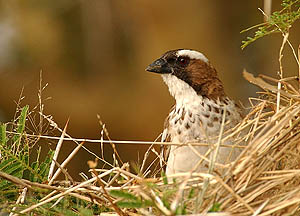
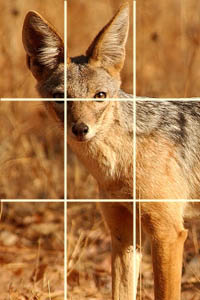 3)
Don't center your subject. There is an idea called the "Rule
of Thirds". It says that important parts of a painting or photograph
should fall along imaginary lines that divide the image into thirds
both horizontally and vertically. Placing important objects at the
intersections of these lines is good too. Horizons, natural
lines, important points (like eyes), and main subjects all will benefit
from being put in these locations. If you have a hard time remembering
to do this when taking the photograph, you can still practice doing
it afterward. Crop your photos (either using a computer, by trimming
your prints with scissors, or masking parts of your slides) and see
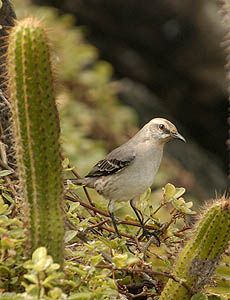
the improvement. Below is a photo that I took , trying to put the
cacti on rules of thirds, but the main subject is the mockingbird,
so I think the cropped version that enlarges the bird and puts it
off-center is better.
3)
Don't center your subject. There is an idea called the "Rule
of Thirds". It says that important parts of a painting or photograph
should fall along imaginary lines that divide the image into thirds
both horizontally and vertically. Placing important objects at the
intersections of these lines is good too. Horizons, natural
lines, important points (like eyes), and main subjects all will benefit
from being put in these locations. If you have a hard time remembering
to do this when taking the photograph, you can still practice doing
it afterward. Crop your photos (either using a computer, by trimming
your prints with scissors, or masking parts of your slides) and see
the improvement. Below is a photo that I took , trying to put the
cacti on rules of thirds, but the main subject is the mockingbird,
so I think the cropped version that enlarges the bird and puts it
off-center is better.
4) Try to
show depth. Photographs are 2-dimensional representations of
3-dimensional objects. Many of my favorite photos convey a sense of
depth well. There are a few ways to try to acheive this illusion in
a 2-D piece of art.
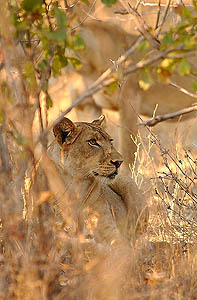
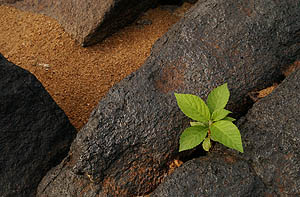
- Selective
focus. Show out of focus foreground and/or background items with
your main subject sharp. This is great for photos of individual
flowers and animals. Putting the backgorund out of focus conveys
depth and simplifies your photo so the subject stands out. To acheive
this, you need a wide aperture, i.e. low f-number.
 -
Converging lines. Try to show lines that converge and join in the
distance, like two banks of a river. People know that river banks
are more or less parallel to each other so if they see them converging,
their brains automatically assume great distance. This affect can
be acheived with tree trunks, beaches, the glint of sunlight on
water, and many other linear features.
-
Converging lines. Try to show lines that converge and join in the
distance, like two banks of a river. People know that river banks
are more or less parallel to each other so if they see them converging,
their brains automatically assume great distance. This affect can
be acheived with tree trunks, beaches, the glint of sunlight on
water, and many other linear features.
 -
Boldly include foreground and distant objects. I like this technique
in landscapes. This technique is sometimes easier to accomplish
with the camera held vertically. To acheive this with both close
and distant subjects in sharp focus, you need a small aperture setting
(high f-number) and often the aid of a tripod.
-
Boldly include foreground and distant objects. I like this technique
in landscapes. This technique is sometimes easier to accomplish
with the camera held vertically. To acheive this with both close
and distant subjects in sharp focus, you need a small aperture setting
(high f-number) and often the aid of a tripod.
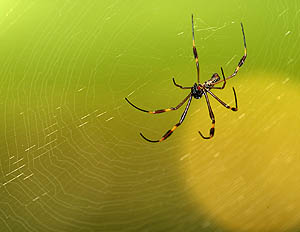
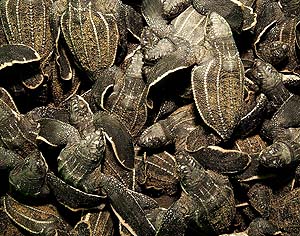
5) Look for
repeating patterns. Even in nature, you can find these. Drawing attention
to patterns makes people see things they might not have noticed before.
Even better, if you can show a pattern and an interruption
of it, then you can draw special attention to the interruption.
6) Try to
include curves, diagonals, and triangles. These contrast against the
overall shape of the photograph (typically rectangular or square and
level to the world) and can get someone to look at your photograph
twice.
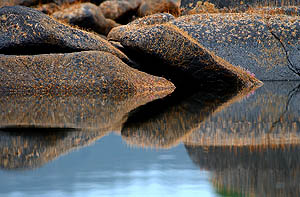
7) Show symmetry.
Most people do not see nature as having much order, but more random.
Letting them see that symmetry exists in nature can make your photograph
more interesting because of the revelation the viewer has. Good examples
of symmetry can be seen in reflections and leaf patterns.
8) Frame your
subject. Put your subject in its surroundings. Choose other objects
that lead the eye to the main subject.
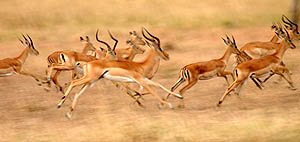
9) Try to
show motion. Of course this is easier with a video-camera, but that's
the point. If you can show motion in a motionless form, then people
are fascinated by it. It's like you have frozen time. Sometimes this
is best shown by showing something the viewer knows is moving in sharp
focus, with time seemingly suspended. The new  cinematic
techniques shown in the Matrix movies are so successful because they
freeze motion in a way people have never seen. Sometimes the best
way to show motion is with "motion blur", either of the
main subject (by holding the camera still and slowing the shutter
speed) or of the background (by panning with the subject and using
a slow shutter speed.) The first way is easier. Panning takes practice
and even the best practitioners throw out most of their panning shots.
cinematic
techniques shown in the Matrix movies are so successful because they
freeze motion in a way people have never seen. Sometimes the best
way to show motion is with "motion blur", either of the
main subject (by holding the camera still and slowing the shutter
speed) or of the background (by panning with the subject and using
a slow shutter speed.) The first way is easier. Panning takes practice
and even the best practitioners throw out most of their panning shots.

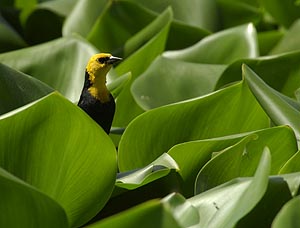
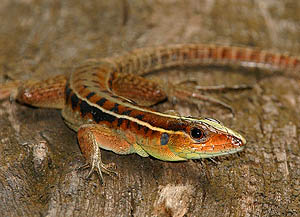
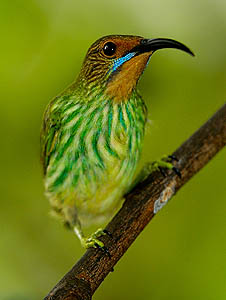
10) Use contrast effectively. Show your light-toned subject on a dark
background. Show your dark subject on a light background. Look at
the well-lit and silhouetted sides of things. These so-called "High
Key - Low Key" techniques are well-known in all areas of photography
but especially portraiture. They can be applied very effectively in
nature photography, but of all these rules, this is the one I break
most often. I often like to show my subject blending with their surrounding
in terms of tone and/or color, using selective focus to make them
stand out. Finding contrasts in color while keeping overall light/dark
contrast low can also be effective. The sunrise uses light/dark contrast
while the honeycreeper below uses color and focus contrasts.
Final Thoughts:
A common theme in
all of these ideas for compostion is this: Show people what they
haven't seen before. This means you have to see differently
than you have seen before too. This means you have to see experimentally.
That is a big part of the fun and addiction of making photographs.
Also remember these are just ideas. Many great photographs break these
rules blatantly, and sometimes that is the point. Use these
ideas until they are natural for you, then stop actively thinking
about them and let your trained eye make the decisions for you.
